DIY Wall-E Robot
Rebuilt the electronics and software for a 3D-printed Wall-E robot using an ESP32, servo and motor drivers, audio hardware, power conversion, custom C++ code, and schematic/PCB design.
- Controller
- ESP32 with custom Arduino/C++ firmware
- Motion
- PCA9685 servo control and L298N motor drive
- Power and Audio
- 3S battery, separate motor/servo power, and DFPlayer Mini

This build was inspired by the original 3D-printed Wall-E project. I used the mechanical concept as a starting point, then redesigned the electronics around lower-cost parts, my own wiring, and my own control software.
Mechanical Build
I printed the body and alternate remix parts before final assembly. Because the project uses a large amount of filament, printing the alternate parts first helped avoid wasted duplicate prints and made the mechanism easier to adapt.
Electronics
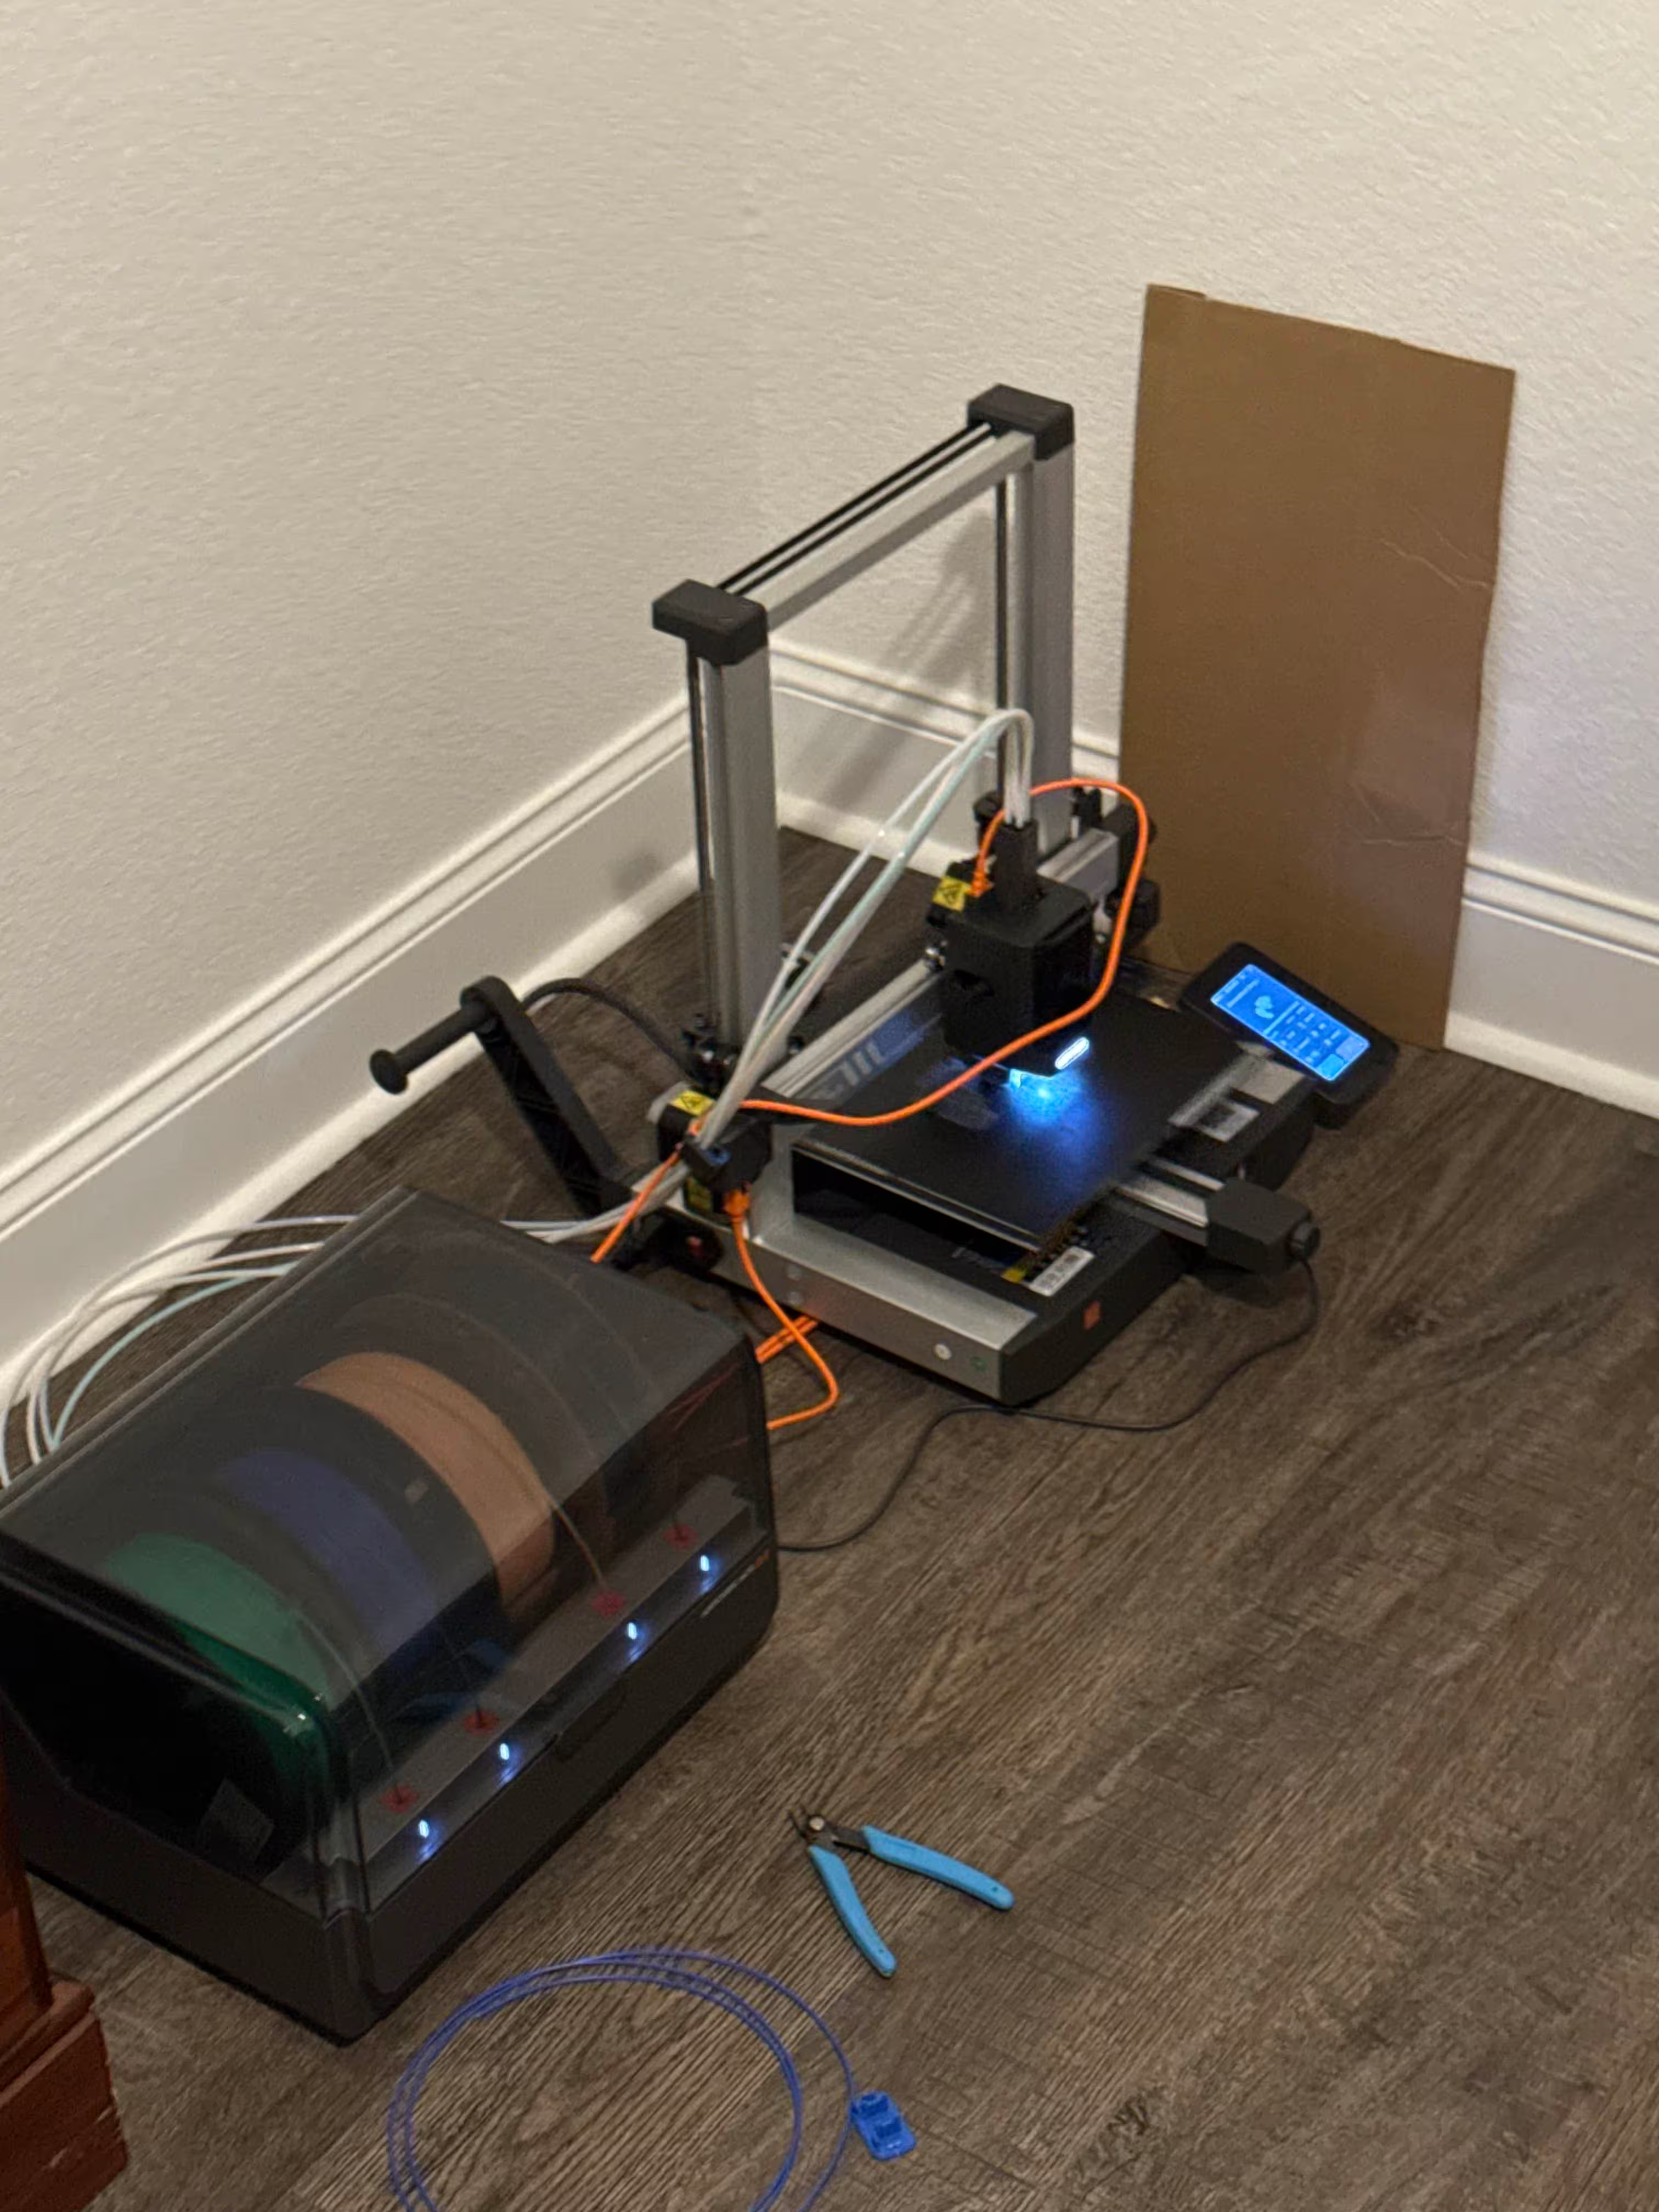
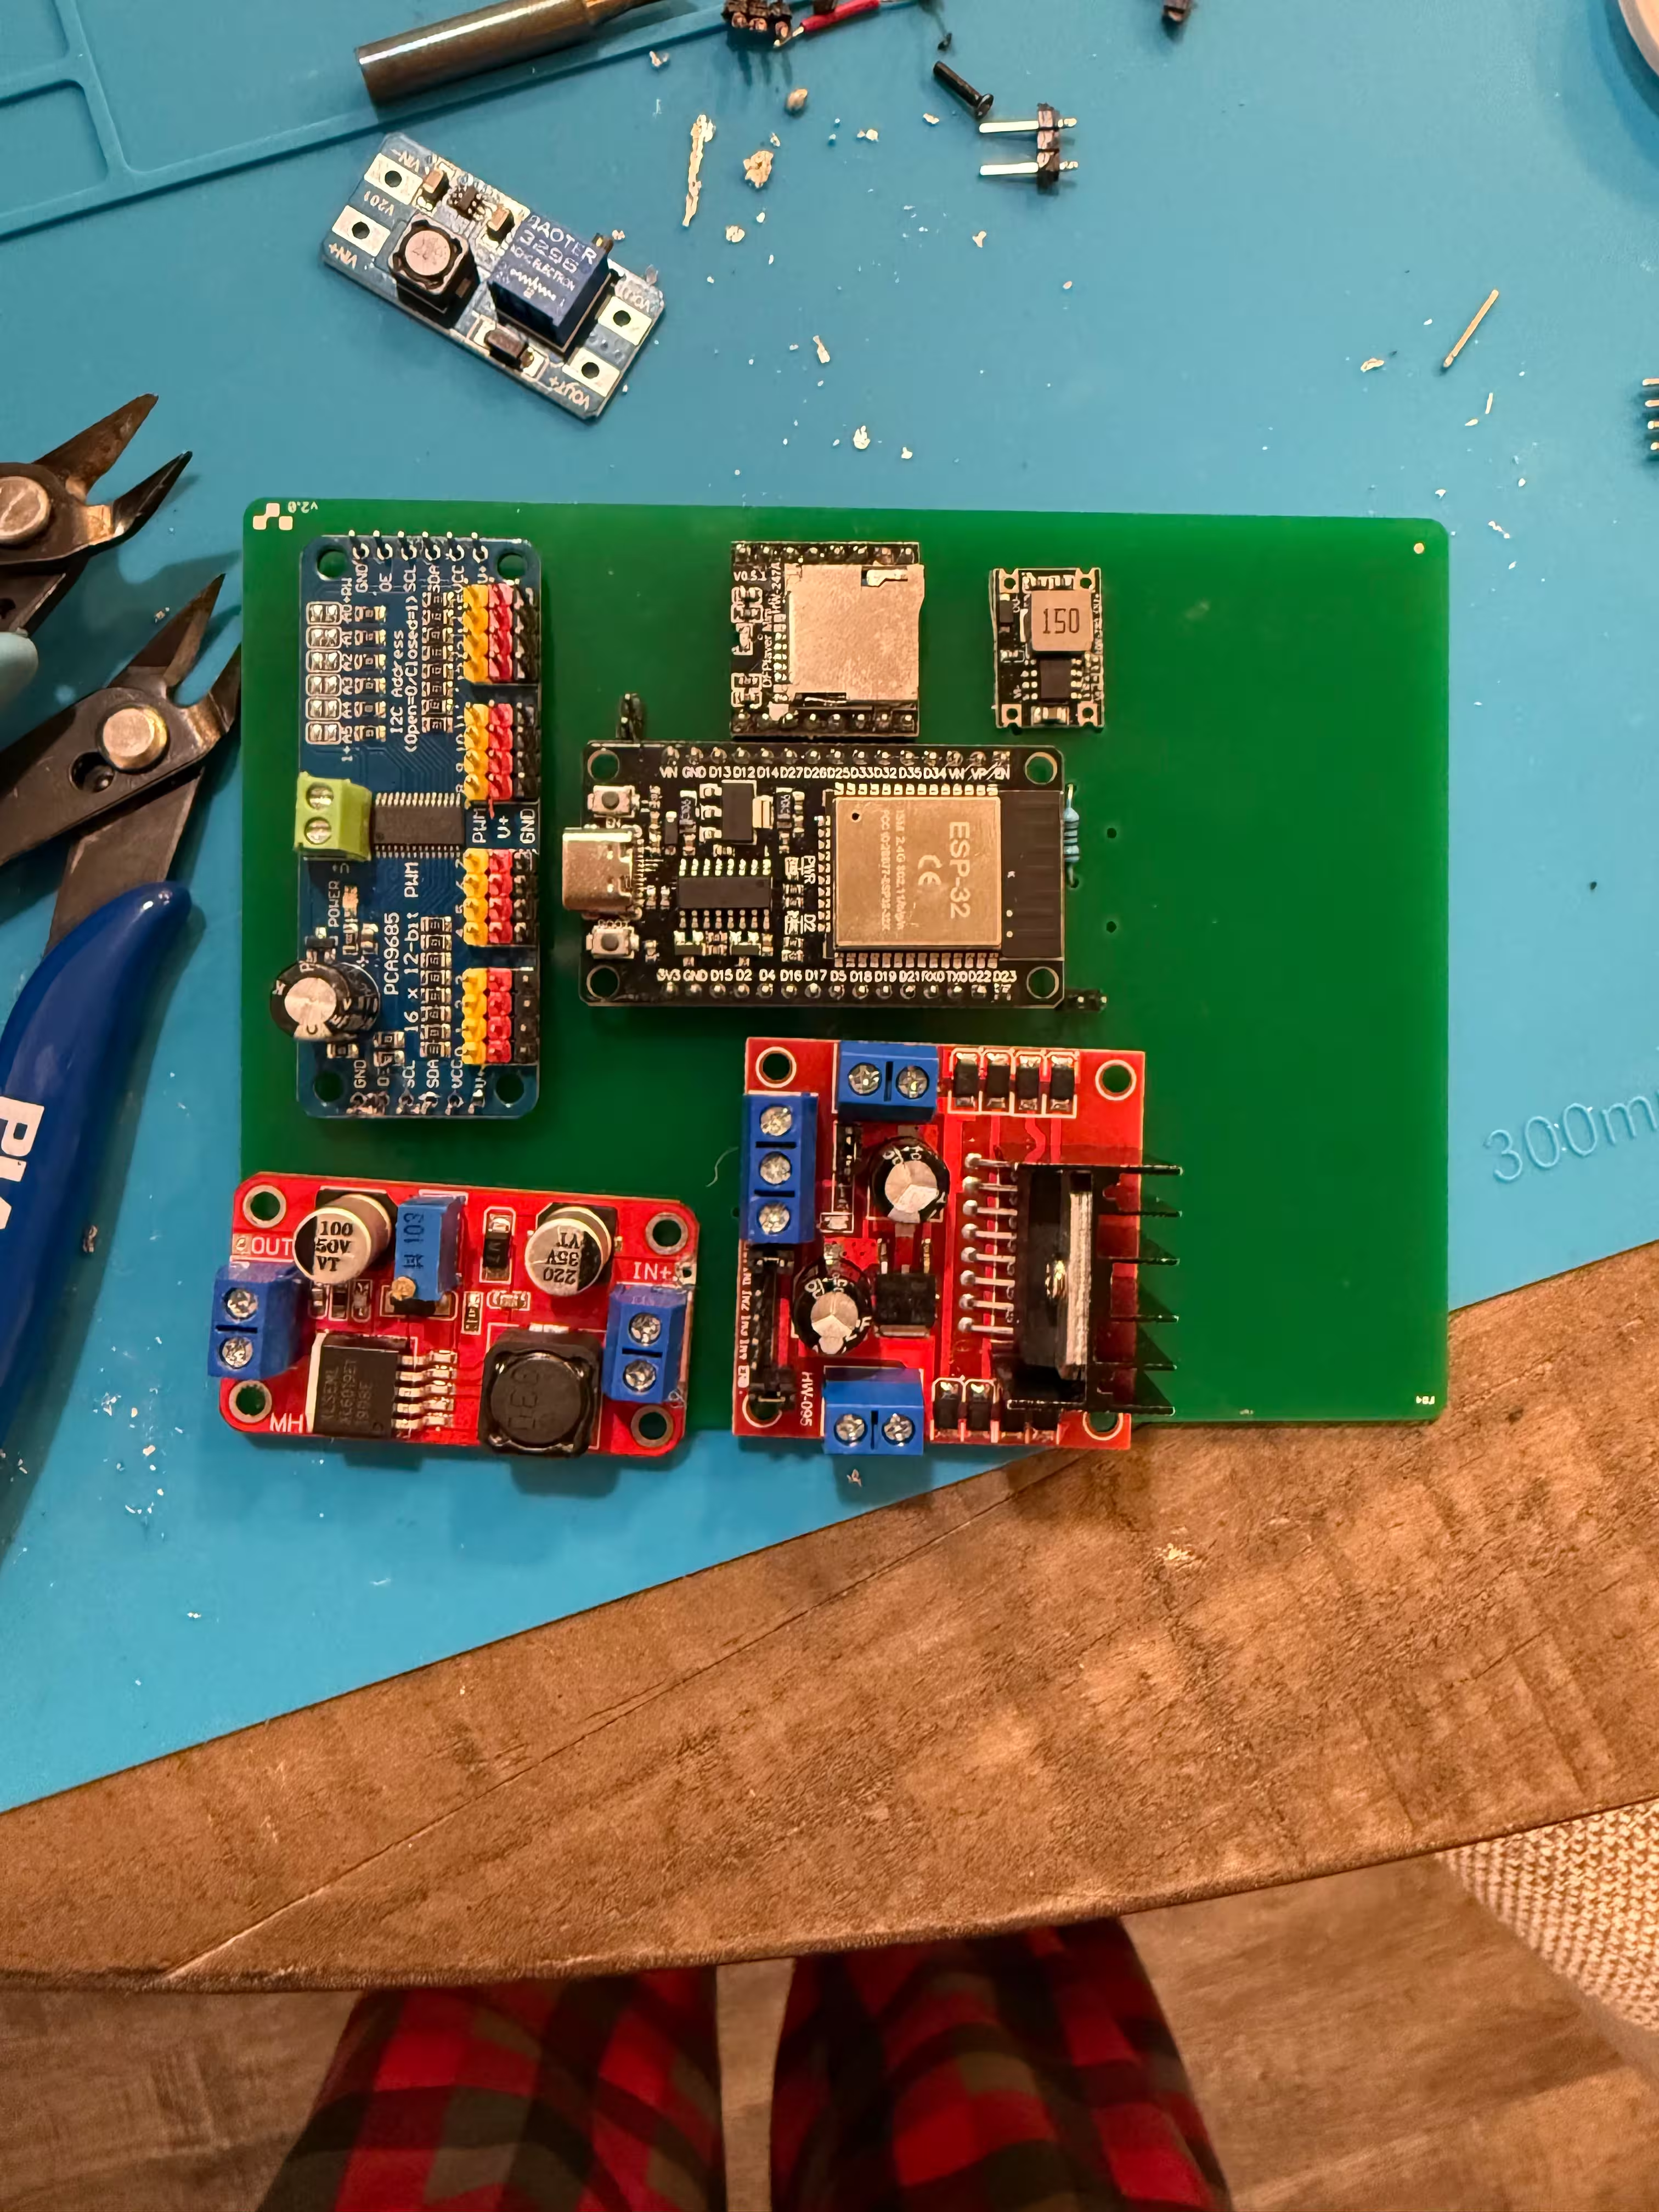
The documented electronics include an ESP32-32S module, PCA9685 servo controller, L298N 12 V DC motor driver, XL6019 boost converter, DFPlayer Mini audio module, 4 Ohm 3 W speaker, two 12 V motors, and MG90S metal servos. I now recommend a higher-current UBEC instead of the small 5 V converter shown in the early parts photo.
Controller PCB Revisions
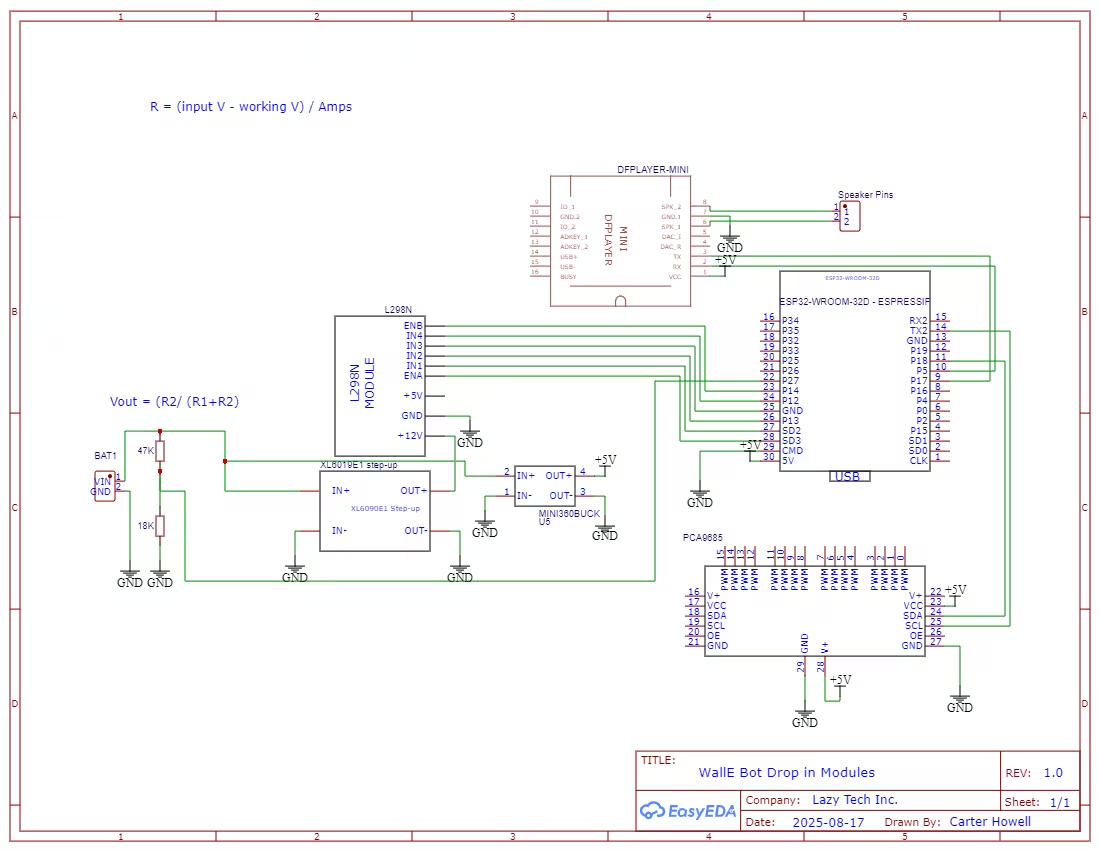
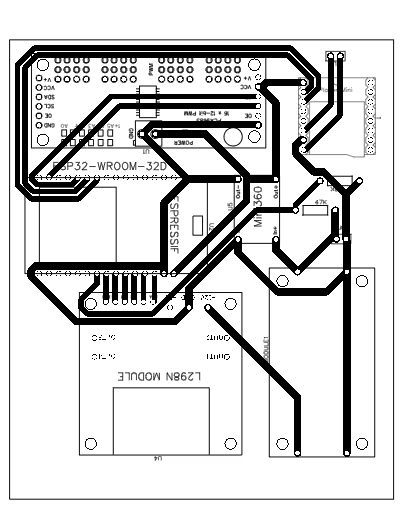
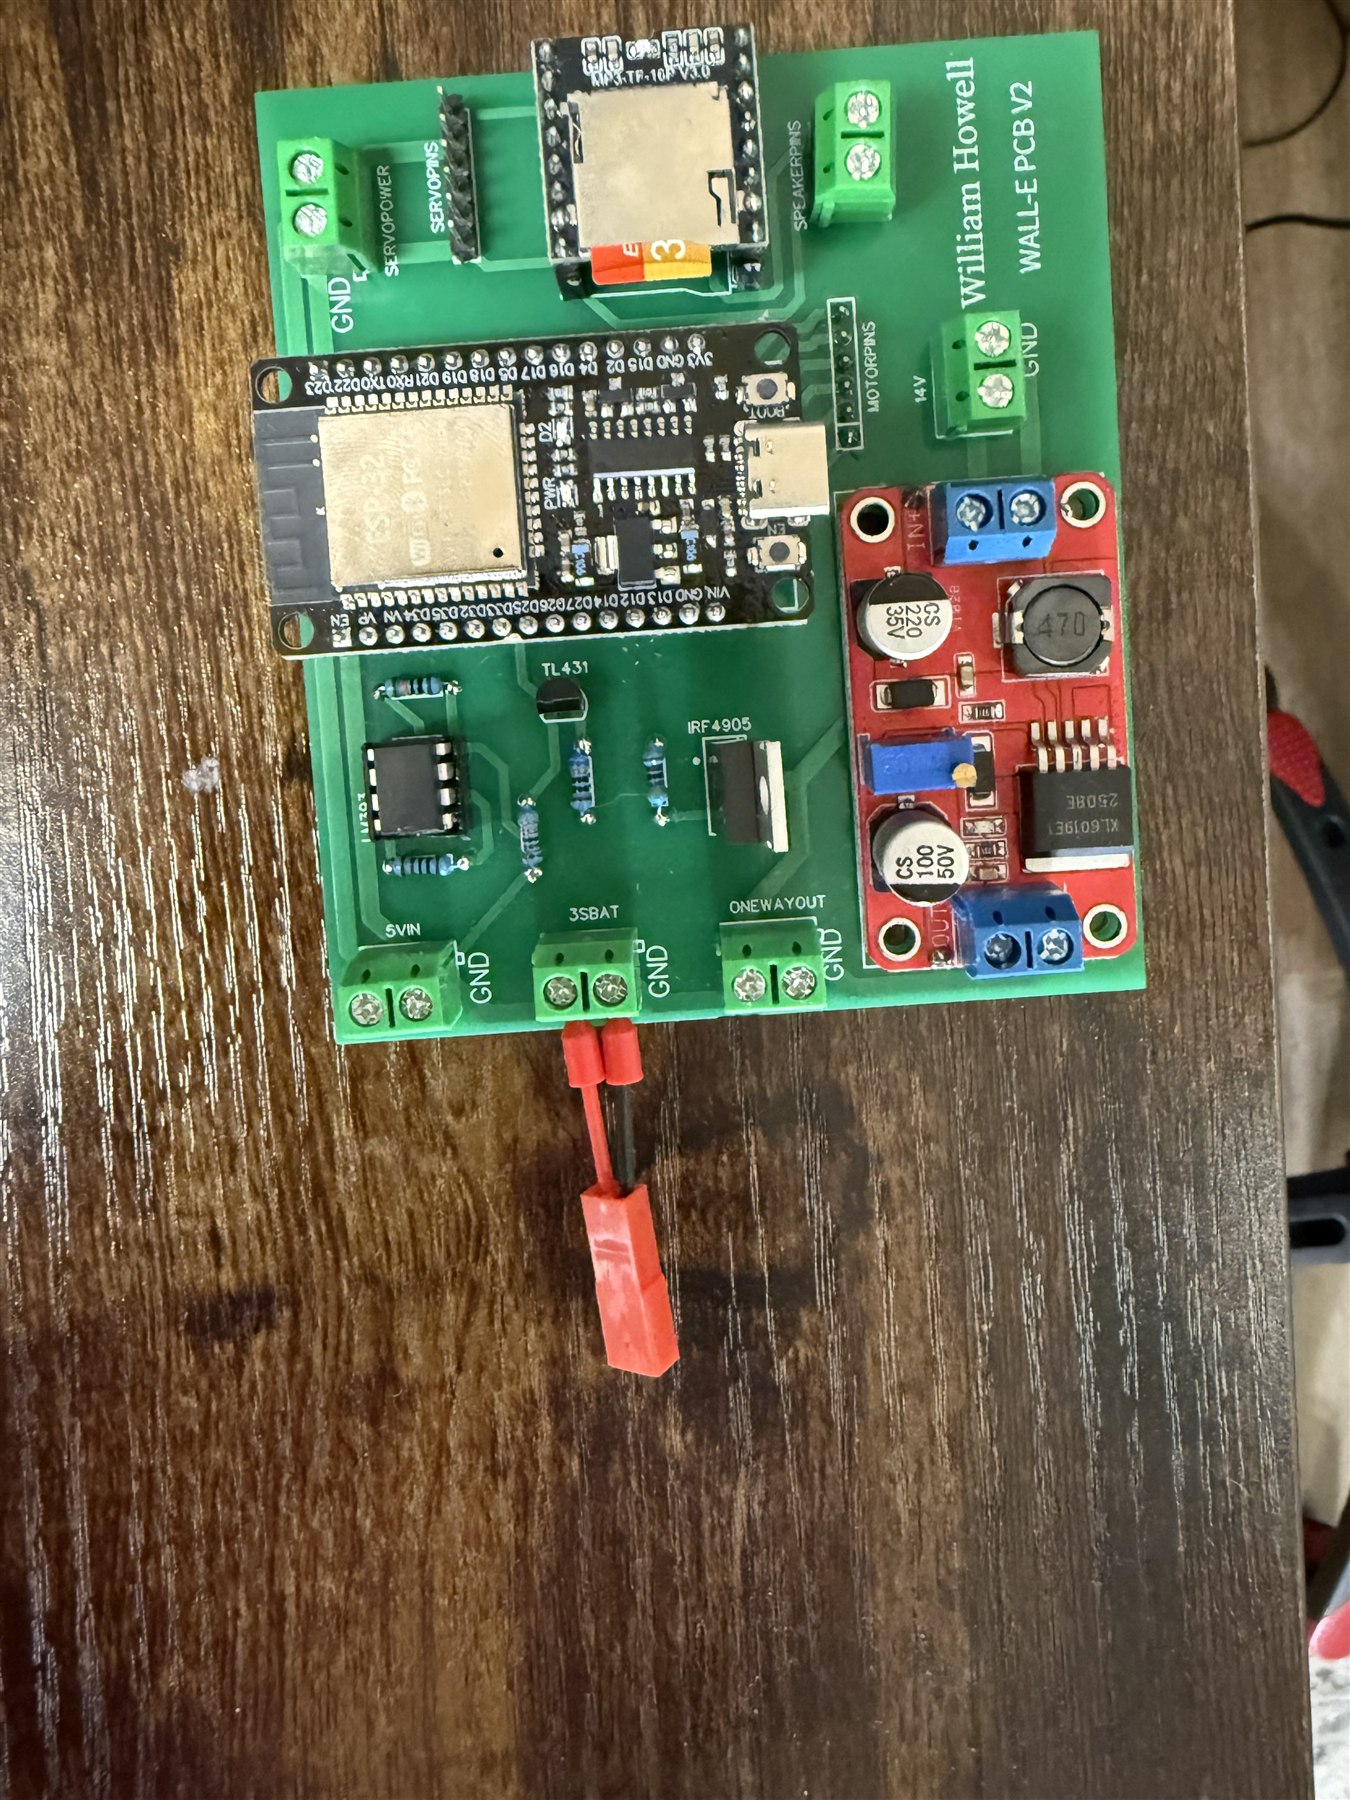
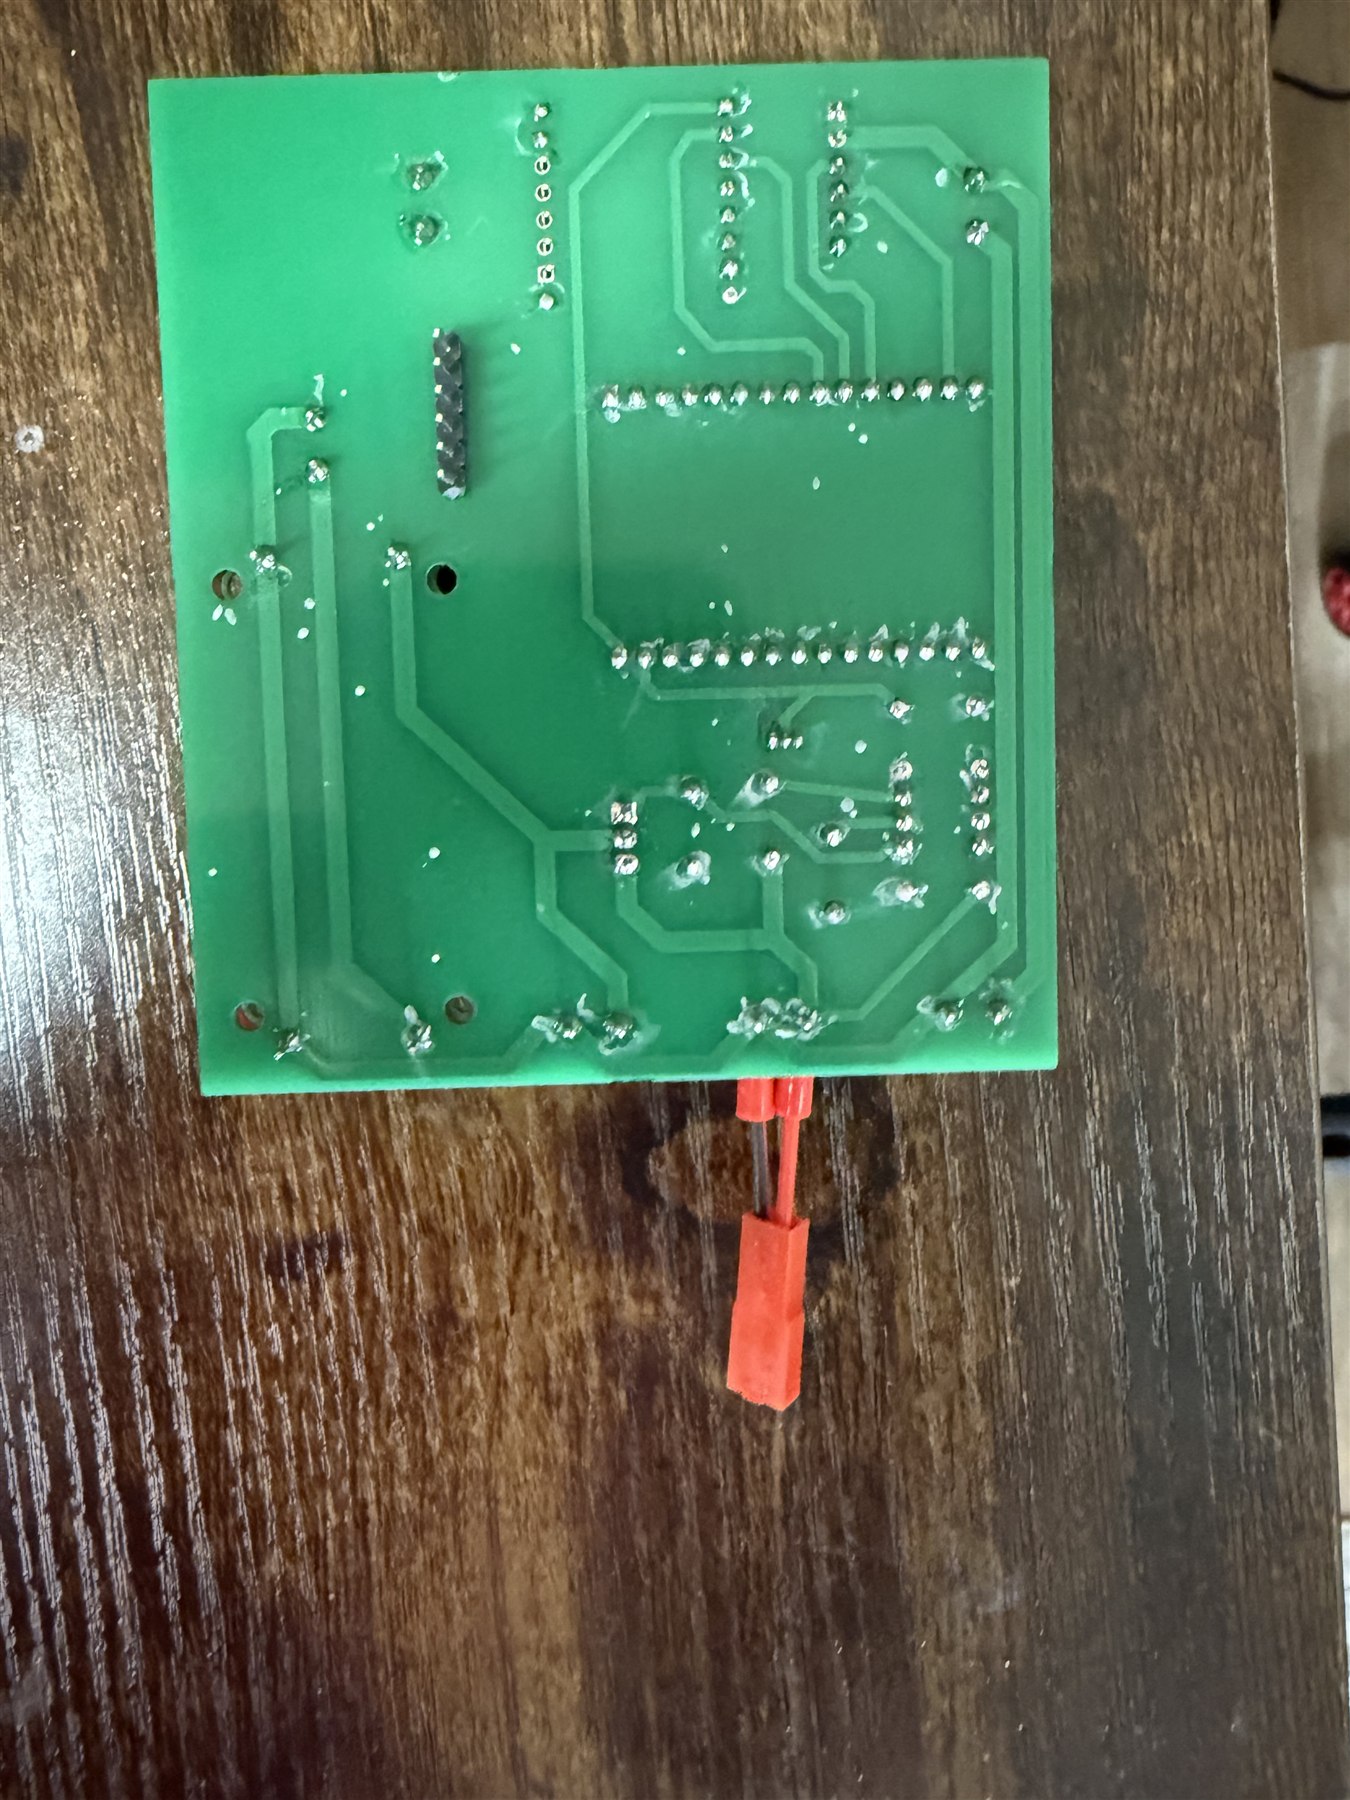
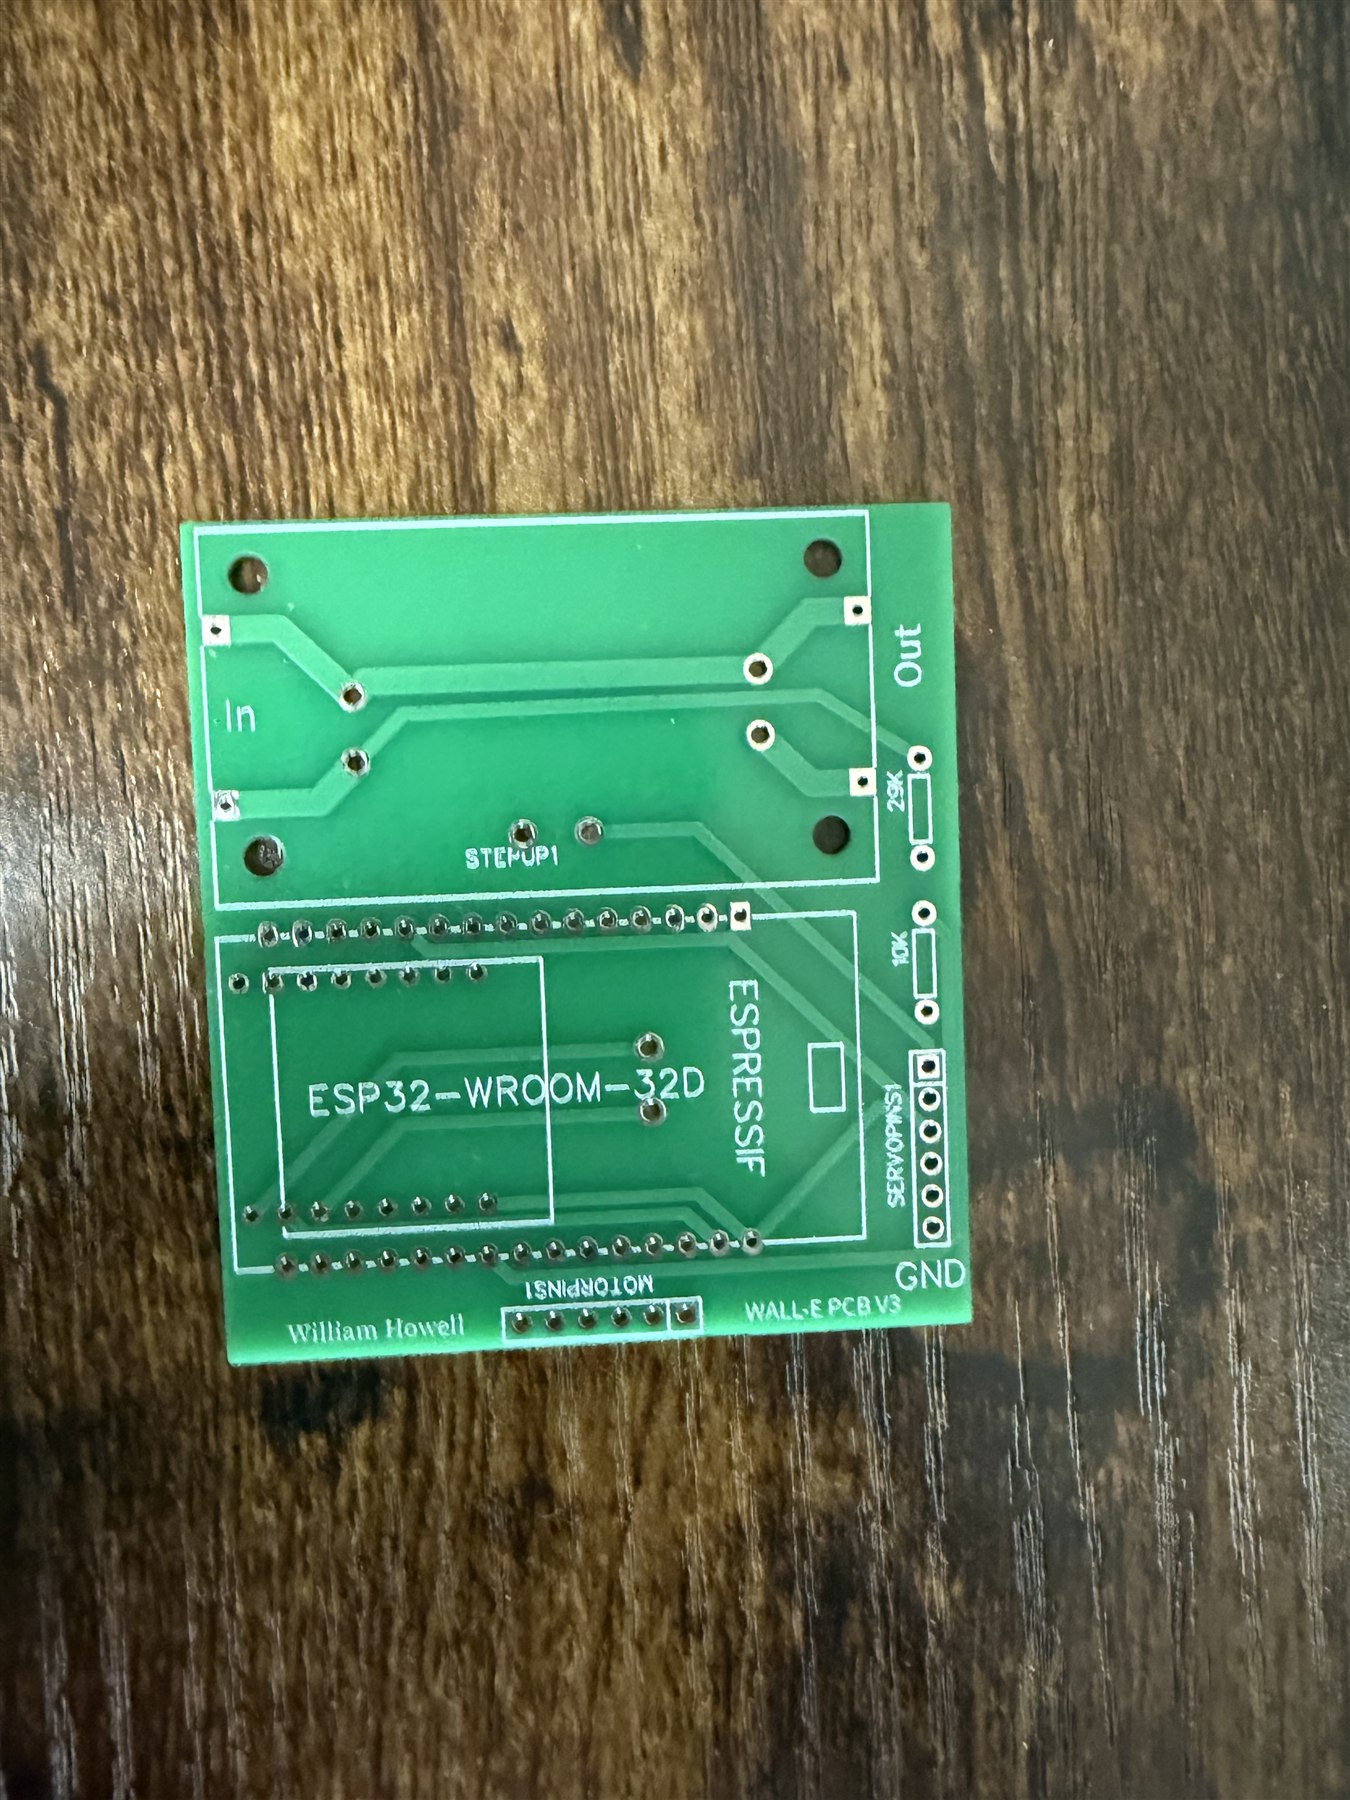
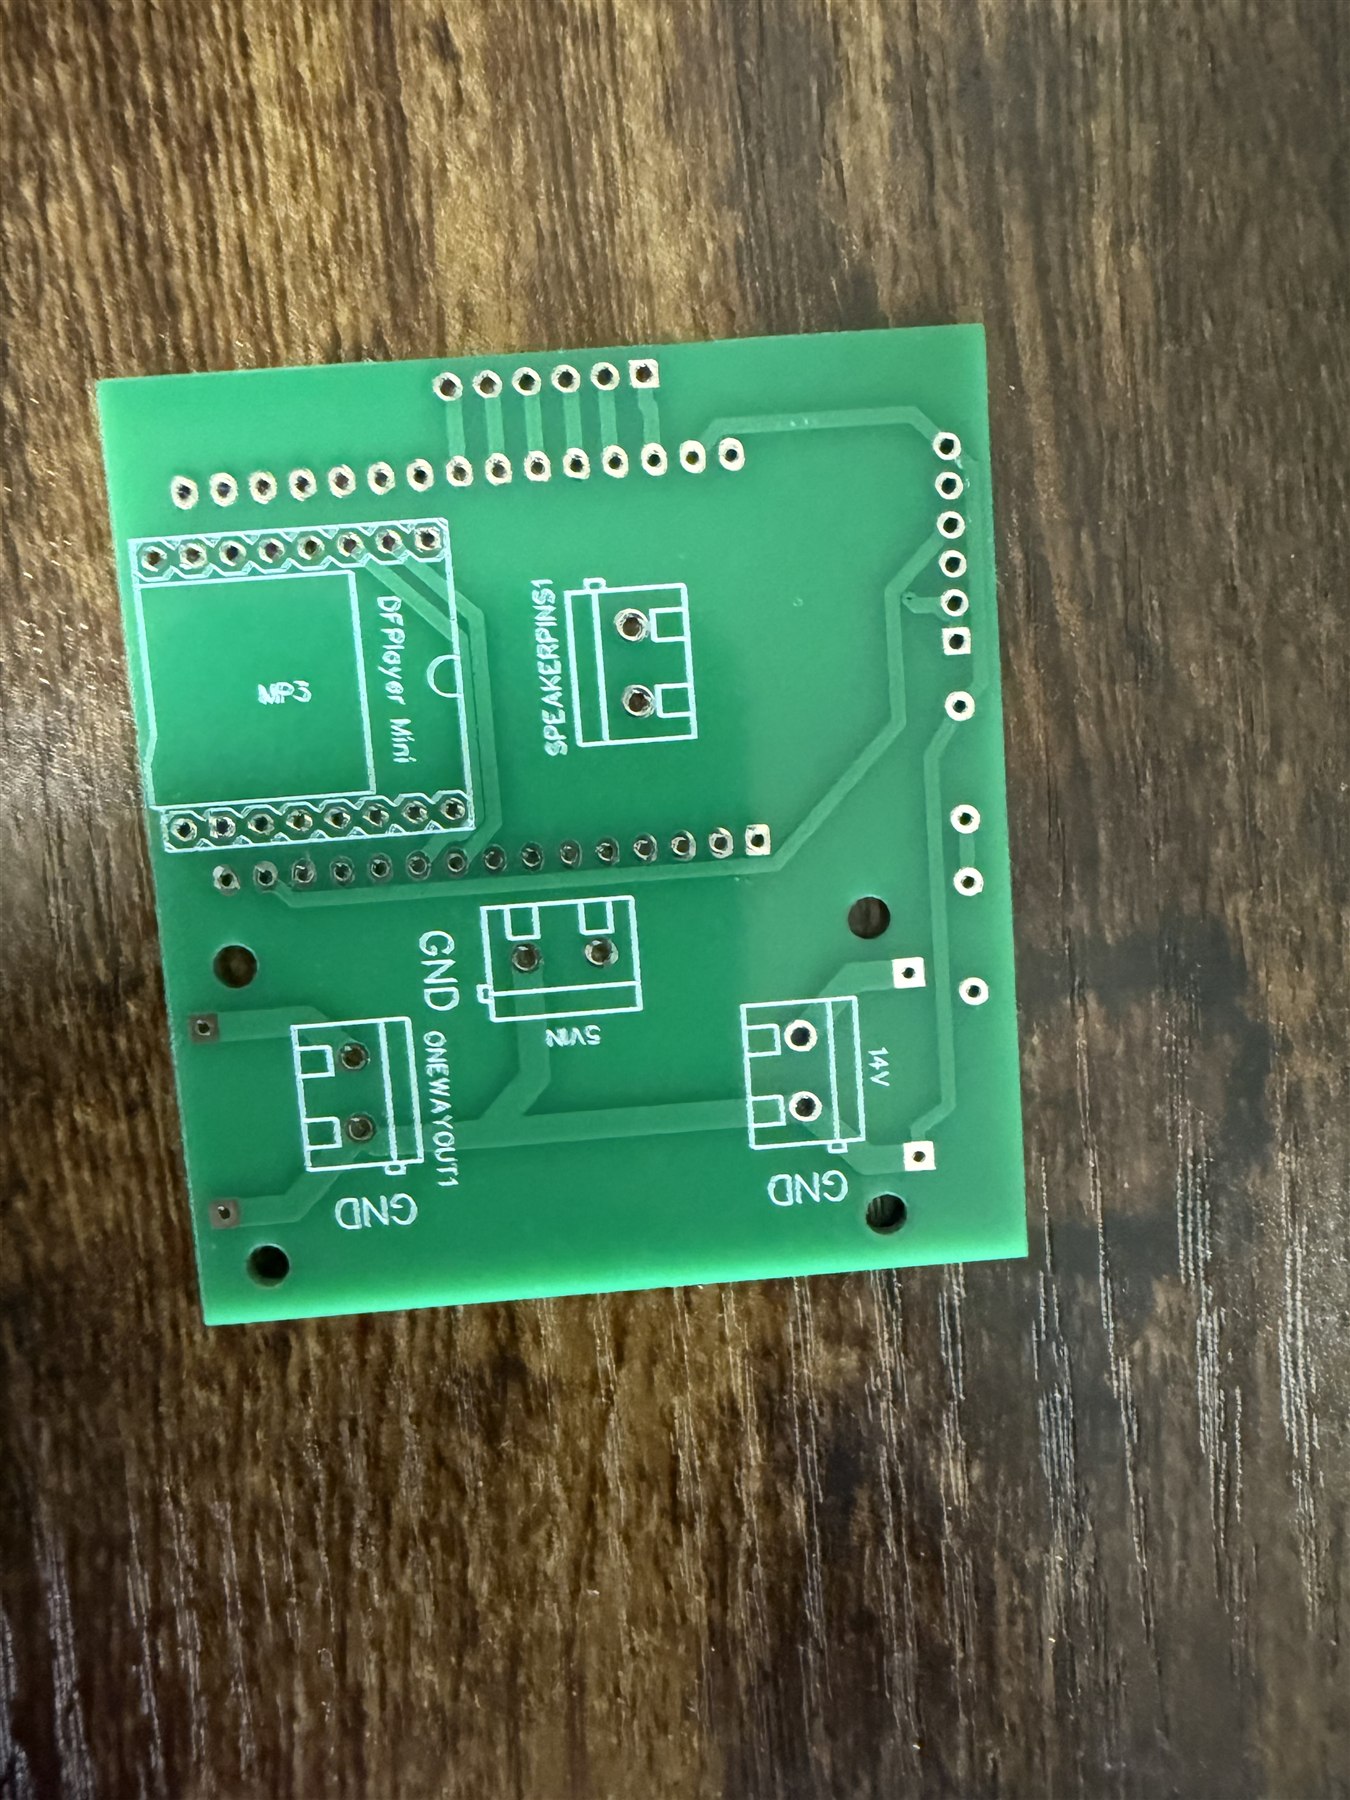
I designed two controller-board revisions in EasyEDA to organize the ESP32, audio, motor, servo, power, and battery connections. I refer to them as Revision 1 and Revision 2 based on fabrication order; the visible silkscreen labels read WALL-E PCB V2 and WALL-E PCB V3.
Revision 1: assembled and working
I assembled and tested the first controller board, and it worked without functional problems. Its main drawback was size: the replacement electronics fit inside the original body, but the available space is extremely tight.
Revision 2: smaller but not assembled
The second board is much smaller and places plug-in modules on both sides. I left it unassembled because several modules would be supported mainly by their headers, and I did not want mechanically unsupported parts inside a moving robot. The board was manufactured, but I did not electrically test this revision.
Packaging and Power Notes
Everything fits inside the existing printed body, although the fit is extremely tight. I designed a different front panel to make room for the OLED display.
For another compact revision, I would replace the L298N and boost converter with a dual motor ESC rated for a 3S battery. For the servo rail, I recommend a 5 V, 8 A UBEC instead of a small buck-converter module. I budget up to roughly 2 A for a stalled servo, so the control code should limit how many high-load servo movements happen at once.
Firmware
My code is separate from the original project. It uses the Arduino IDE and ESP32 Bluepad32 support. Before running the full program, I calibrate each servo with test code so the correct travel limits can be entered into the main firmware.
Loading code...
Current Build
The assembled robot drives from a Bluetooth controller, moves its arms and claws through the PCA9685 servo board, and plays audio through the DFPlayer Mini. The first controller PCB also worked fully in testing; I left the smaller second revision unassembled because I was not satisfied with its mechanical support.